This article explains:
- LED statuses for Ultium and Core sensors and charging stations
- How to power sensors on/off
- Troubleshooting for sensor charging and detection
Charging Station LED Statuses
Status
Solid Blue
Meaning
What should be plugged in

The charging station can communicate with the sensors. This is required for these functions:
- “Detect sensors in chargers”
- “Zero Gyros”
- Offline Lossless data recovery (link to user manual for more details🔗)
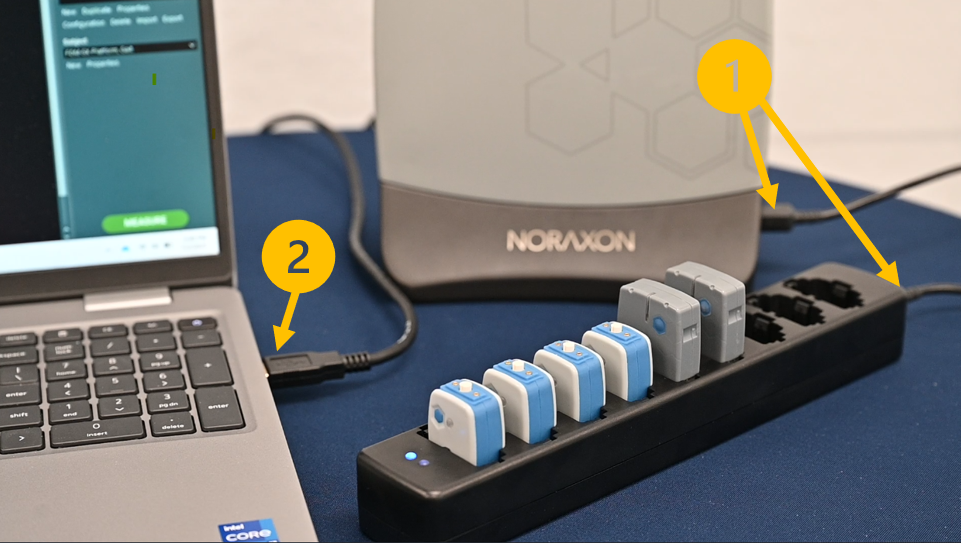
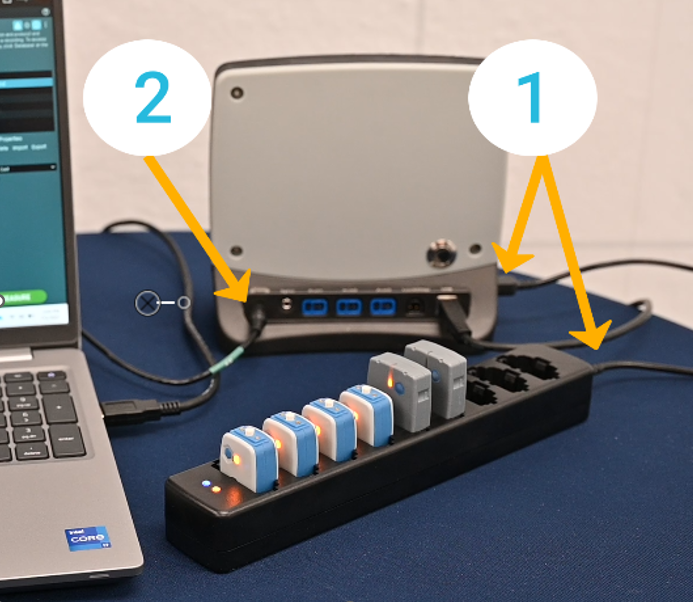
1. The charging station(s) is plugged into the side(s) of the Ultium receiver.
2. The Ultium Receiver is plugged into the computer via USB.
Solid Yellow
The charging station is receiving power from the Ultium receiver.
1. The charging station(s) is plugged into the side(s) of the Ultium receiver.
2. The power supply (PSU1) must be plugged into the Ultium Receiver.
Sensor LED Statuses
Status
Video
Meaning
Blinking Blue
Sensor is powered on and ready for connection.
Solid yellow
Sensor is charging.
NOTE: If the yellow LED is turned off, but the sensor is in the charging station and connected to power, this indicates the sensor is fully charged and the charging mechanism has turned off.
Blinking green
Sensors are activated for measurement and streaming data to the Ultium receiver / MR software.
Blinking blue & yellow
Sensors are both turned on (blinking blue) and charging (solid yellow). Both statuses are shown at once.
Powering sensors ON and OFF
Sensors can be powered on/off in 3 ways:
Method #1 (Most common)
Press the silver button on the Ultium receiver or reset button on the Portable Lab when sensors are plugged into the charger and the receiver is plugged into the computer.
Note: This button is a switch, so if sensors are turned ON by the software, the button may need to be pressred twice to turn sensors OFF — Once to flip the switch to the ON position, then again to power off.
Method #2
Open the Ultium settings from the Hardware Setup.
Method #3
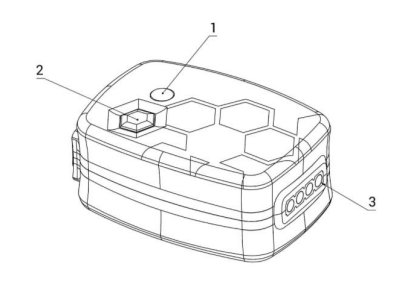
Use the button on the front of the sensor. This can be used to power sensors on/off individually rather than in a group.
NOTE: This button is also used to reset the sensor.

Tips & Troubleshooting
- If the yellow LED does not appear on your sensors while charging, verify the following:
-
The power supply is plugged into the Ultium receiver
-
The charging stations are securely plugged into the side ports of the Ultium receiver
-
The yellow LED is present on the charging station
-
The sensor LED is facing the LED on the charging station (sensor is not backwards in the charger)
-
NOTE: If connections are secure and the yellow LED is also present on the charging station, consider that the sensors may be fully charged, which turns the yellow LEDs off.

- A sensor that flashes red once when you try to power it on may be completely drained. Place it in the charging station for at least 20 minutes before trying to power it on again.
- Ensure contacts on both the sensor and charger are clean for consistent charging.
- If a solid LED of any color appears on the sensor, perform a hard reset:
- Press the sensor power button, holding down for 3 seconds or until the sensor powers off.
- Wait 3 seconds.
- Turn the sensor back on using the power button.

