Introduction
The UDP Streaming feature provides a direct and efficient method for streaming motion capture data from the MR software into Unity. This capability opens the door for real-time integration of biomechanical data into a wide range of interactive environments, including virtual and augmented reality (VR/AR), simulation-based training, ergonomic evaluations, and live animations.
This feature was developed to streamline the workflow for users who wish to visualize and interact with motion capture data inside Unity. By enabling a live data stream from the MR software, users can develop immersive, data-driven applications for research, clinical evaluation, product design, and educational purposes. It is particularly valuable for teams working in VR/AR ergonomics, interactive human movement simulations, or Unity-based visualizations of biomechanical data.
Who Can Benefit From This Feature?
This feature is designed for:
-
Researchers and developers building Unity applications that require live human movement data.
-
Teams creating VR/AR training simulations involving motion analysis.
-
Ergonomic analysts looking to assess posture and motion in virtual workspaces.
-
Educators teaching movement science, biomechanics, or immersive technology applications.
How to Use the UDP Streaming Feature
Follow the steps below to download the Unity package, configure the MR software, and initiate the UDP stream.
Step 1: Download and Import the Unity Package
-
Download the UDP Streaming Unity Package.
2. Open your Unity project.
3. Navigate to Assets > Import Package > Custom Package and select the
downloaded .unitypackage.
4. Follow the prompts to import all required assets into your project.
Step 2: Open a Record in the MR Software
-
Launch the MR software.
-
From the Database tab, select and open a record containing motion capture data.
-
Switch to the VIEW tab to access the data visualization and analysis tools.
Step 3: Enable UDP Streaming in Ergonomics Tools
-
Within the VIEW tab, open the Ergonomics Tools operation. (Note: This feature is only available with the Ergonomics Toolkit module.)
-
Select UDP Streaming from the list of tools.

Step 4: Configure the UDP Stream
-
Enter the Destination IP address and port where the Unity application is configured to receive data.
-
For local development, use
localhost. -
For streaming over a network, enter the IP address of the receiving machine.
-
-
Select the Segments and Landmarks you want to stream. These correspond to anatomical segments or marker points used in your motion capture configuration.

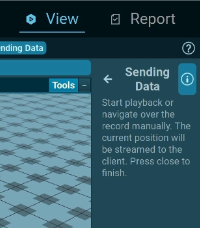
Note: The data will start streaming from MR as soon as playback is initiated, indicated by a message in the menu.
Step 5: Start the Stream and Receive Data in Unity
-
In Unity, ensure your script or visualization is listening on the correct Address and Port.
-
Once configured, return to the MR software and press Start (or begin playback of the record) to initiate data transmission.
-
Your Unity scene should now begin receiving real-time data corresponding to the selected motion segments and landmarks.
UDP Streaming Demo Video
Best Practices & Troubleshooting Tips
-
Confirm that your firewall settings allow UDP traffic through the specified port.
- Unity not receiving data: Double-check the IP address and port number on both ends.
- Data lag or dropouts: Reduce the number of segments/landmarks streamed or optimize your Unity receiving logic.
- Port already in use: Use a different port number and restart the stream.