Introduction
The Virtual Calibration Adjustment Tool (vCAT) provides a flexible way to refine a subject’s calibration when the expected calibration posture cannot be fully achieved. This feature allows users to virtually correct the alignment of IMU-based segment orientations using on-screen 2D video drawing tools and the 3D avatar interface. By adjusting joint angles and segment positions directly within the software, users can ensure accurate biomechanical outputs even when working with populations who have limited mobility, pain, postural constraints, or other factors preventing them from assuming the standard calibration position. The result is cleaner, more representative calibration — especially for clinical populations and subjects where posture challenges are common.
This tool is especially valuable for clinical and real-world environments where ideal calibration conditions are not always possible. Instead of repeating data collection or compromising analysis quality, users can make precise post-hoc adjustments that realign the model to the subject’s true anatomical posture.
For details on what constitutes appropriate and expected calibration conditions, please refer to the linked IMU Calibration Guide in the Calibration Requirements Section.
Who is the vCAT for?
- Clinicians assessing patients with limited mobility
- Researchers needing to correct habitual posture offsets
- Sports practitioners capturing athletes with non-neutral baselines
Warnings & Considerations
Requirements
The Virtual Calibration Adjustment tool is compatible with versions of MR 4.2.22 and later. Users must also have access to at least 1 Ninox camera and the myoMOTION module with a Noraxon IMU-based motion capture system.
Enabling the vCAT
To enable the vCAT supported functional calibration procedure, enable the Walking calibration with MCAT operation in the Software Setup.
NOTE: The Walking calibration is the only supported VCAT calibration workflow. At this time, other calibration routines (Forward Lean, Multipose) are not supported.

Performing the Calibration
Once the VCAT calibration mode is enabled, additional activities/steps will be added to the Walking Calibration workflow to capture the required postures for calibration correction.
For more information on the standard Walking Calibration workflow, visit the Walking Calibration tutorial linked below. When using the VCAT, the initial calibration position will be adjusted, so it is not necessary to ensure strict adherence to the initial calibration posture.
After performing the standard walking calibration, MR will prompt you to capture 3 more snapshots:
Front Standing

Instructions:
Capture a pure coronal view of the subject in the same calibration position as the original Standing Pose.
Left Standing

Instructions:
Capture a pure left sagittal view of the subject in the same calibration position as the original Standing Pose.
Right Standing

Instructions:
Capture a pure right sagittal view of the subject in the same calibration position as the original Standing Pose.
When the Walking Calibration is completed, select Save & View to go to the View tab. This is where you will access the calibration correction settings.
Best Practices for Capturing the Calibration Poses
A high-quality video recording significantly enhances the quality of analysis and allows pose estimation software to generate more precise measurements. The following guidelines outline best practices for 2D markerless motion capture using Noraxon’s myoRESEARCH software.
Camera Setup
Here are some general recommendations for setting up your camera system:
- Place the camera as close as possible to the subject, while ensuring the subject’s entire body remains in view.
- Partial views of the subject are not supported by the tracking engine.
- Position the camera about waist-high to the subject and make sure it is level.
- Avoid angling the camera up or down and putting it too low or too high.
- Ensure the camera is completely perpendicular to the plane of motion (e.g., sagittal or coronal), with the subject centered in view.
- Skewed camera angles will distort angle data
Subject Attire
The pose estimation algorithms in MR are resilient to different types of clothing, but results can vary.
General recommendations for subject attire include:
- Tightly fitted clothing is preferred.
- Individual limbs should be easily detectable from the rest of the body.
- Attire with rich visual features is preferred.
- A high contrast between the subject and the background enhances the visibility of features.
- Lighter colors generally provide more visual features (e.g., shadows, creases, texture), but black attire is acceptable with sufficient lighting.
- Consider the contrast between the feet and the landing surface.
Accessing Calibration Adjustment Operations in the Model Options
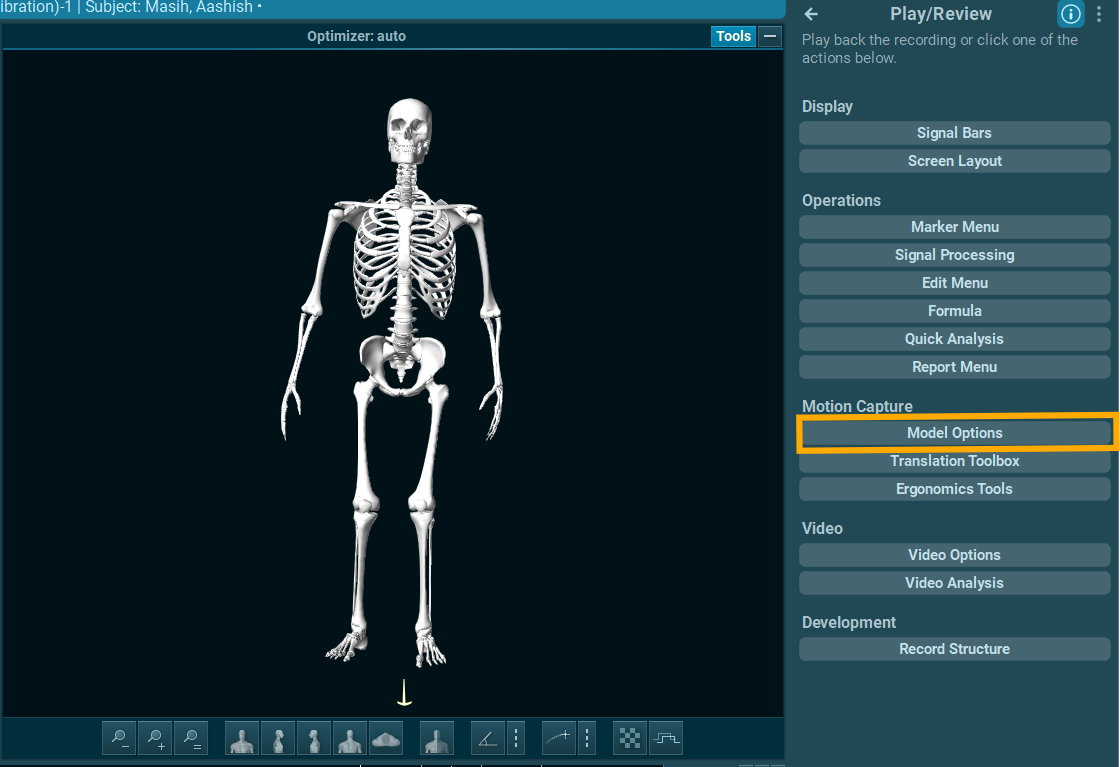
After storing the calibration file, follow the steps below to access the calibration correction operations from the Model Options in the View tab.
1. Select Model Options from the toolbar.
2. Select Adjust.
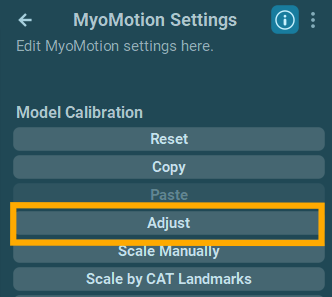
NOTE: Refer to the Calibration Correction section of this article to learn more about correcting the calibration using the operations in this menu.
Calibration Adjustment
When the Adjust menu is accessed, MR automatically detects the coronal or sagittal plane for each supplementary posture captured in the extended VCAT-supported Walking Calibration. During the calibration correction process, the user is prompted to adjust the model calibration using their mouse using the poses detected by the video-based markerless tracking.
Video Tracking
Markerless tracking is automatically detected and applied to each pose starting with the video of the Front Standing capture.
If desired, manually adjust the joint markers on the video by clicking and dragging. Click Apply to Model on the toolbar to apply video-based edits to the motion avatar on the right.
Model Correction
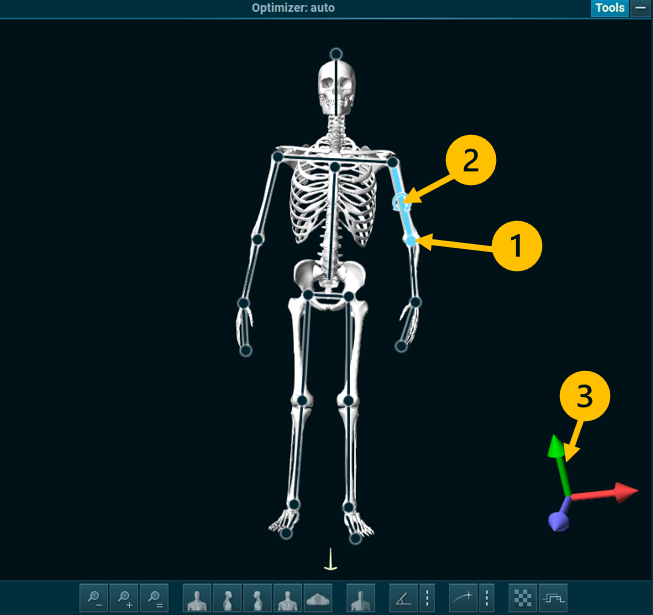
To make 3D corrections, adjust the joint and segment positions on the avatar after applying the markerless corrections to the 3D model.
There are several ways to move the avatar in 3D. The video above shows all 3 methods.
1. Click and drag the joint center to move the joint position/angle while keeping other segments in the same position.
2. Click and rotate the segment when the “rotate” button appears to rotate the segment.
3. Use the 3D axis on the bottom right to adjust the selected segment in 3D.
Calibration Adjustment Operations
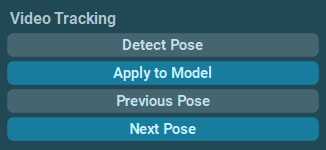
Video Tracking
Detect Pose: Run markerless tracking for the selected video at the cursor position (clears previous manual edits)
Apply to Model: Correct the Avatar calibration so that it matches the detected markerless pose in the selected video
Previous Pose: Go to previous posture for correction
Next Pose: Go to the next posture for correction. A highlighted “Next” indicates invisited steps ahead.
Undo/Redo buttons
Undo: Revert the mode recent calibration adjustment.
Redo: Reapply the last undone calibration adjustment.

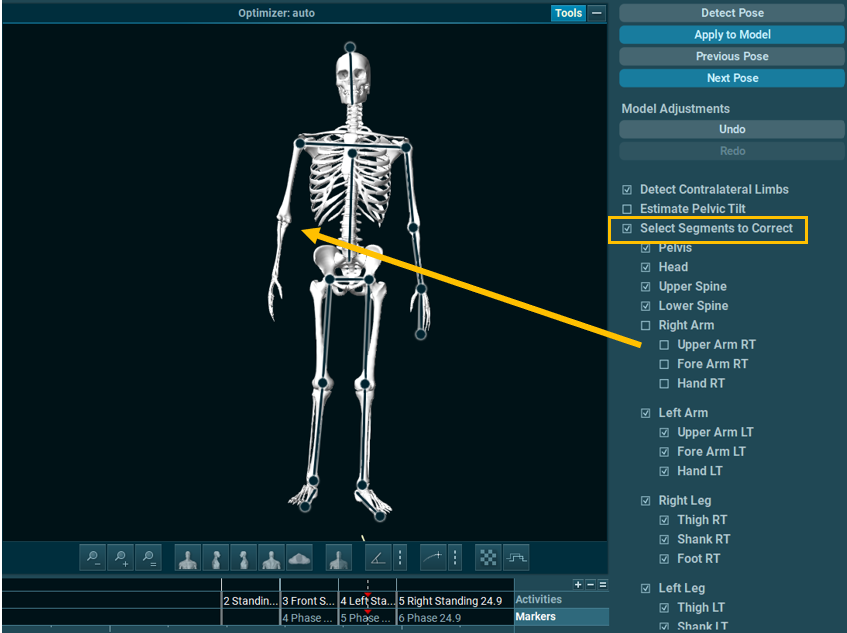
Select Segments to Correct
Optionally, enable Select Segments to Correct to disable correction for selected segments.
Segments with disabled correction will no longer be available to correct, and will appear without black lines over the segment for manipulation.
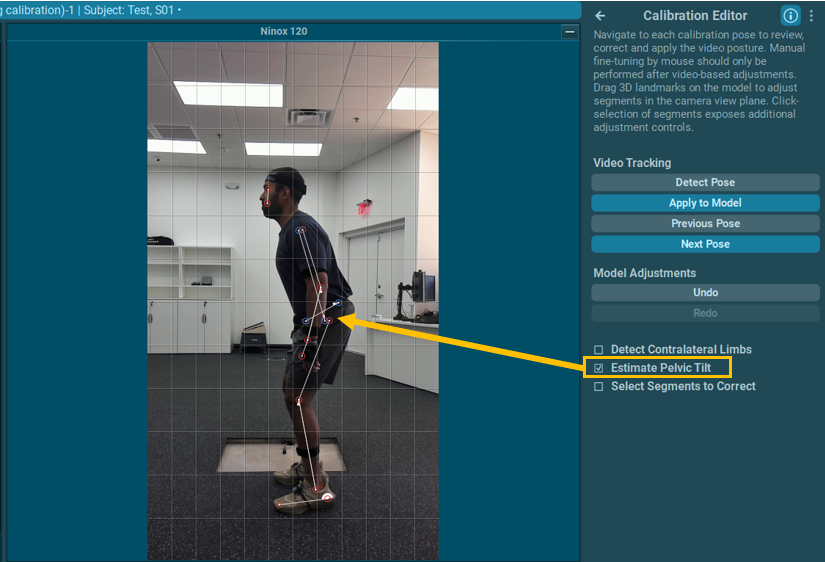
Estimate Pelvic Tilt
Estimates Pelvic Tilt and applies the estimation to the sagittal plane poses during markerless video detection.
After enabling, click “Detect Pose” to add the Pelvic Tilt estimation to the video, then Apply to Model after making adjustments.
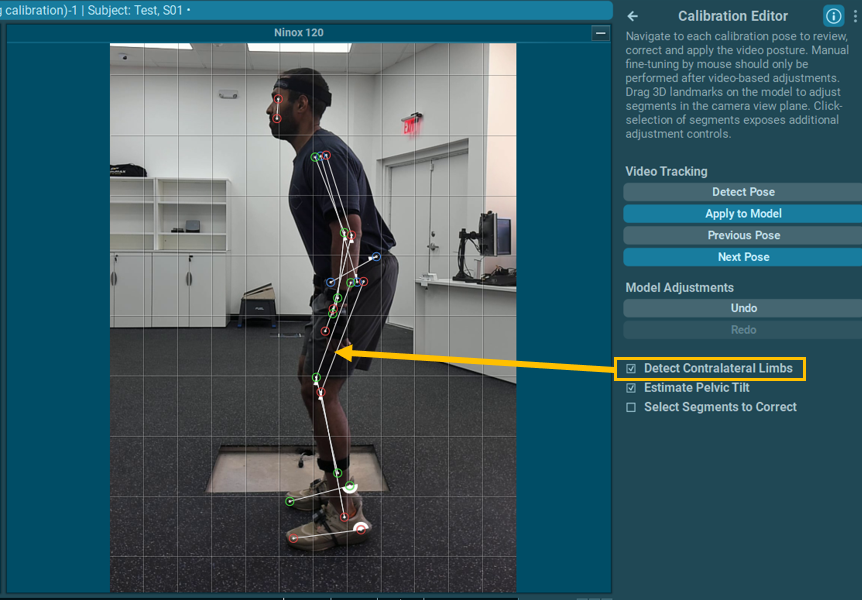
Detect Contralateral Limbs
Enables markerless tracking of contralateral limbs so landmarks can be detected on the side facing away from the camera.
NOTE: Use with caution. This operation is less reliable than ipsilateral tracking (default when left and right sides are captured) since the entire limb is not visible.
Appyling the Calibration
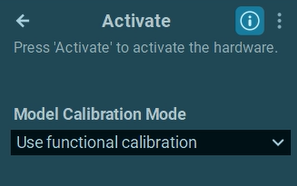
Click FINISH to finish the calibration correction. The calibration will automatically be applied to subsequent measurements with the same subject until a new calibration is performed.
To apply the corrected calibration to the next real-time measurement, select Use Functional Calibration from the calibration mode menu after starting the measurement. This selection must be made immediately after correcting the calibration for the best results.
Using the vCAT Post – Data Collection
The corrected calibration file can be applied to measurments that were already recorded, outside of the real-time workflow.
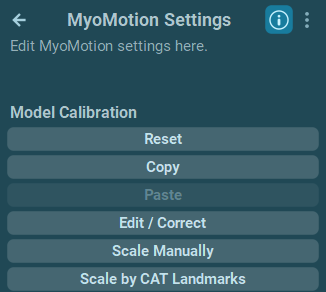
Use the Copy and Paste functions in the Model Options to Copy the corrected calibration data from the calibration file, then Paste the calibration data to a recording.
To reset the calibration data to the original settings before corrections were made, use the Reset buttons.
Putting It All Together
The video below demonstrates the full calibration adjustment process, from calibration, correction, to measurement.
FAQs & Troubleshooting
Q: How do I know if the corrections I made are accurate?
A: Use the video to make your best guess. The calibration corrections are done manually, so there is no true way to compare the subject’s true position against the corrections.
Q: The MR software failes to accurately track the subject with the markerless tracking operation.
A: Ensure the camera is level and set completely perpendicular to the plane of motion (e.g., sagittal or coronal). Confirm that the subject is centered in view and that their entire body is visible throughout the running cycle. Avoid background movement and contrast the runner’s attire with the background to enhance tracking accuracy.
Q: The MR software crashes or freezes during operation.
A: Ensure your computer meets the minimum system requirements🔗and that the software is updated to the latest version. Restart the software and try the operation again. If the issue persists, restart your computer.
Q: I don’t have enough time with my subject/patient to correct the calibraiton in real-time. Can I adjust the calibration file and apply the corrections to my recording later?
A: Yes! Refer to the Using the vCAT Post-Data Collection section of this guide for more information on using the Copy and Paste functions.
Q: I don’t have a camera. Can I still use the vCAT by moving just the 3D model without using the 2D markerless function?
A: Yes, you can use the vCAT without a camera or 2D markerless engine. Approach this method with caution, as there would be no option for comparing the data to the actual subject’s position.
Q: Do I have to correct the poses collected in the vCAT-modified Walking Calibration, or can I correct the model at other frames.
A: It is possible to use the vCAT workflow at any frame. Approach this method with caution.
Technical Support & Feedback
If you continue to experience issues that are not resolved by the suggested solutions, do not hesitate to contact our technical support team. Fill out a Support Request 🔗online or send an email to support@noraxon.com including a detailed description of the problem, the steps you’ve already tried, and any error messages you have received. This information will help our team diagnose the problem more effectively and provide appropriate solutions.
The Virtual Calibration Adjustment tool is an experimental feature. If you have any feedback on usasbility or function, or suggestions for improving the feature, please contact our support team so we can implement your suggestions in future software updates. Your feedback is essential to ensure we are providing the right tools to fit your needs!